
Repotting your indoor plants might sound like a big task, but trust me, it’s one of the best things you can do for them! It’s like giving your plants a little spa day. Over time, plants outgrow their pots, and their roots get cramped. When that happens, they struggle to absorb water and nutrients, which can slow their growth or even harm them. Repotting gives your plants more space to stretch out and thrive! In this guide, I’ll show you how to easily repot your indoor plants so they can continue to grow strong and healthy. Whether you’re a beginner or a seasoned plant parent, I’ve got you covered. Let’s dive in!
Why Should You Repot Your Indoor Plant?
Repotting isn’t just about giving your plant a fresh pot; it’s a mini makeover for your plant’s health! When plants stay in the same pot for too long, their roots can get crowded, which we call “root-bound.” A root-bound plant can’t soak up water or nutrients properly, leaving it looking tired and stressed. Imagine trying to grow and breathe while squeezed in a tiny box—pretty uncomfortable, right?
By repotting, you’re refreshing the soil, which means adding back the nutrients that keep your plant green and lively. Plus, with more space, the roots can stretch out, making it easier for your plant to absorb what it needs to thrive. Repotting also helps prevent issues like root rot, which can sneak up on plants stuck in compact, soggy soil.
In short, repotting is like giving your plant a new home with all the essentials for healthy growth. A little extra space, fresh soil, and your indoor plant will thank you with new growth and vibrant leaves!
When is the Best Time to Repot?
Knowing when to repot is key to keeping your plants happy and healthy! So, how do you know when it’s time? Here are some simple signs to look out for:
- Roots peeking out of the drainage holes. If you see roots escaping through the bottom of the pot, it’s a sure sign your plant needs more space.
- Slower growth or no new leaves. When your plant suddenly stops growing during its usual growth season, it may be cramped and ready for a new pot.
- Soil drying out super quickly. Are you watering often, but the soil still seems dry? Overgrown roots may be filling up the pot and not holding onto water.
- The plant is tipping over. If your plant seems a bit unstable or top-heavy, a bigger pot can give it a sturdier foundation.
As for timing, spring and early summer are the best seasons to repot most indoor plants. During this time, they’re actively growing and can handle the adjustment better. Avoid repotting in the winter when plants are usually in a resting phase, as they’ll be less likely to bounce back quickly.
Look for these clues, and you’ll know exactly when to give your plant the room it needs to grow and shine!
What You’ll Need for Repotting
Ready to repot? Let’s gather a few essentials to make the process smooth and stress-free. Don’t worry—you don’t need a lot, just the right basics to set your plant up for success!
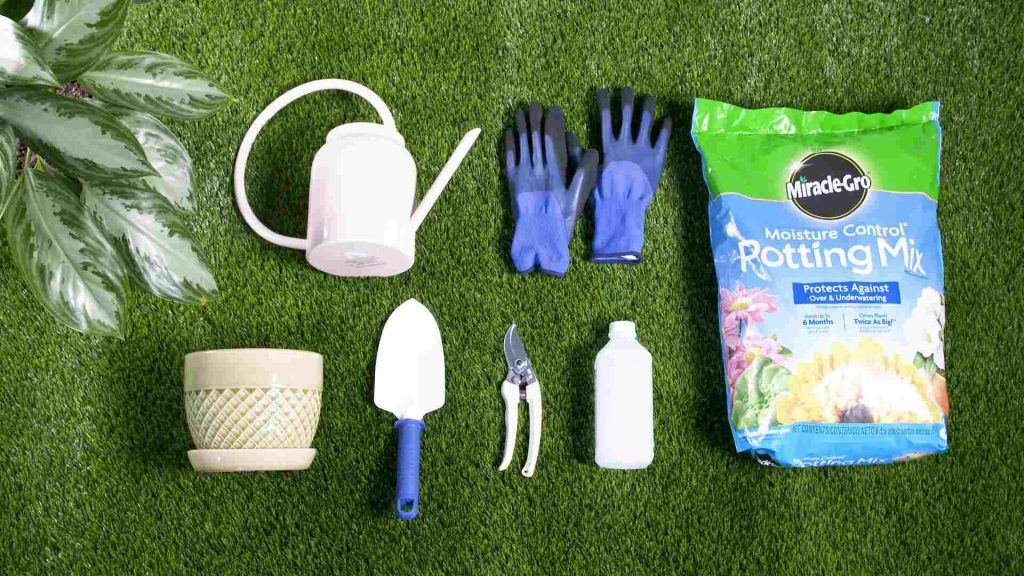
- A New Pot: Choose a pot that’s just 1-2 inches wider than the current one. Going too big might seem like a good idea, but too much extra space can cause the soil to stay wet, which can lead to root rot. And remember, make sure your new pot has drainage holes so any excess water can escape.
- Fresh Potting Mix: Give your plant a boost with some fresh, high-quality potting soil. Different plants have different soil needs, so grab the right mix for your plant type. For example, succulents need well-draining soil, while other indoor plants might prefer a more general potting mix. Here we used repotting mix from Miracle grow, you can use any of these as per the availability. Just be sure that you are buying one labeled as ‘For indoor plants’.
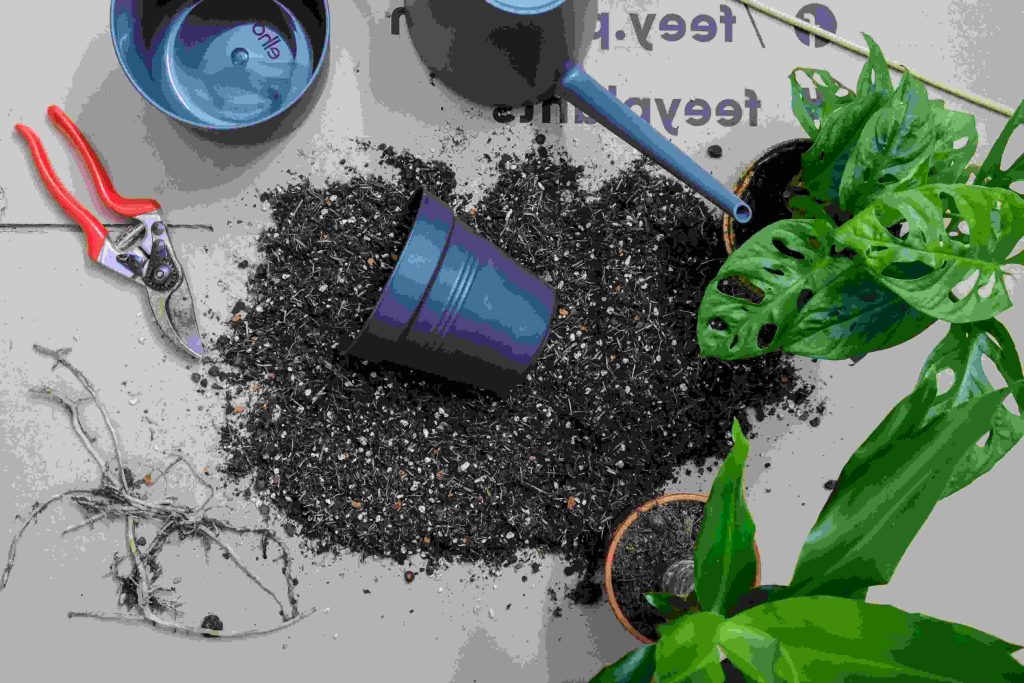
- Tools: A small trowel or shovel works great for scooping soil. You might also want to have a dull knife or pair of scissors on hand to help loosen up the roots if they’re tangled or to trim any damaged roots.
- Water: Finally, keep some water nearby to give your plant a good drink after it’s settled into its new pot. Hydrating the soil will help it settle and eliminate any air pockets.
With these few simple items, you’re fully equipped to repot your plant with confidence! Just a few quick steps, and your plant will be enjoying a fresh start.
Step-by-Step Guide to Repotting Your Indoor Plant
Let’s get into the action! Follow these simple steps to give your plant the perfect home upgrade. Repotting doesn’t have to be complicated, and with this guide, you’ll have your plant nestled into its new pot in no time!
Step 1: Choose the Right Pot
Pick a pot that’s just a little bigger than the old one (about 1-2 inches wider). Too much extra room can lead to soggy soil and root rot. And always make sure it has drainage holes so excess water can flow out—this is key for keeping roots healthy.
Step 2: Prepare the New Pot
Add a layer of fresh potting soil to the bottom of the new pot. This layer gives the roots a soft place to land and helps create a stable base for your plant.
Step 3: Remove the Plant from Its Old Pot
To avoid any damage, tilt the pot on its side and gently pull the plant out by its base. If it’s stuck, try squeezing or tapping the sides of the pot to help it loosen up. You can also use a dull knife to slide around the edges if needed.
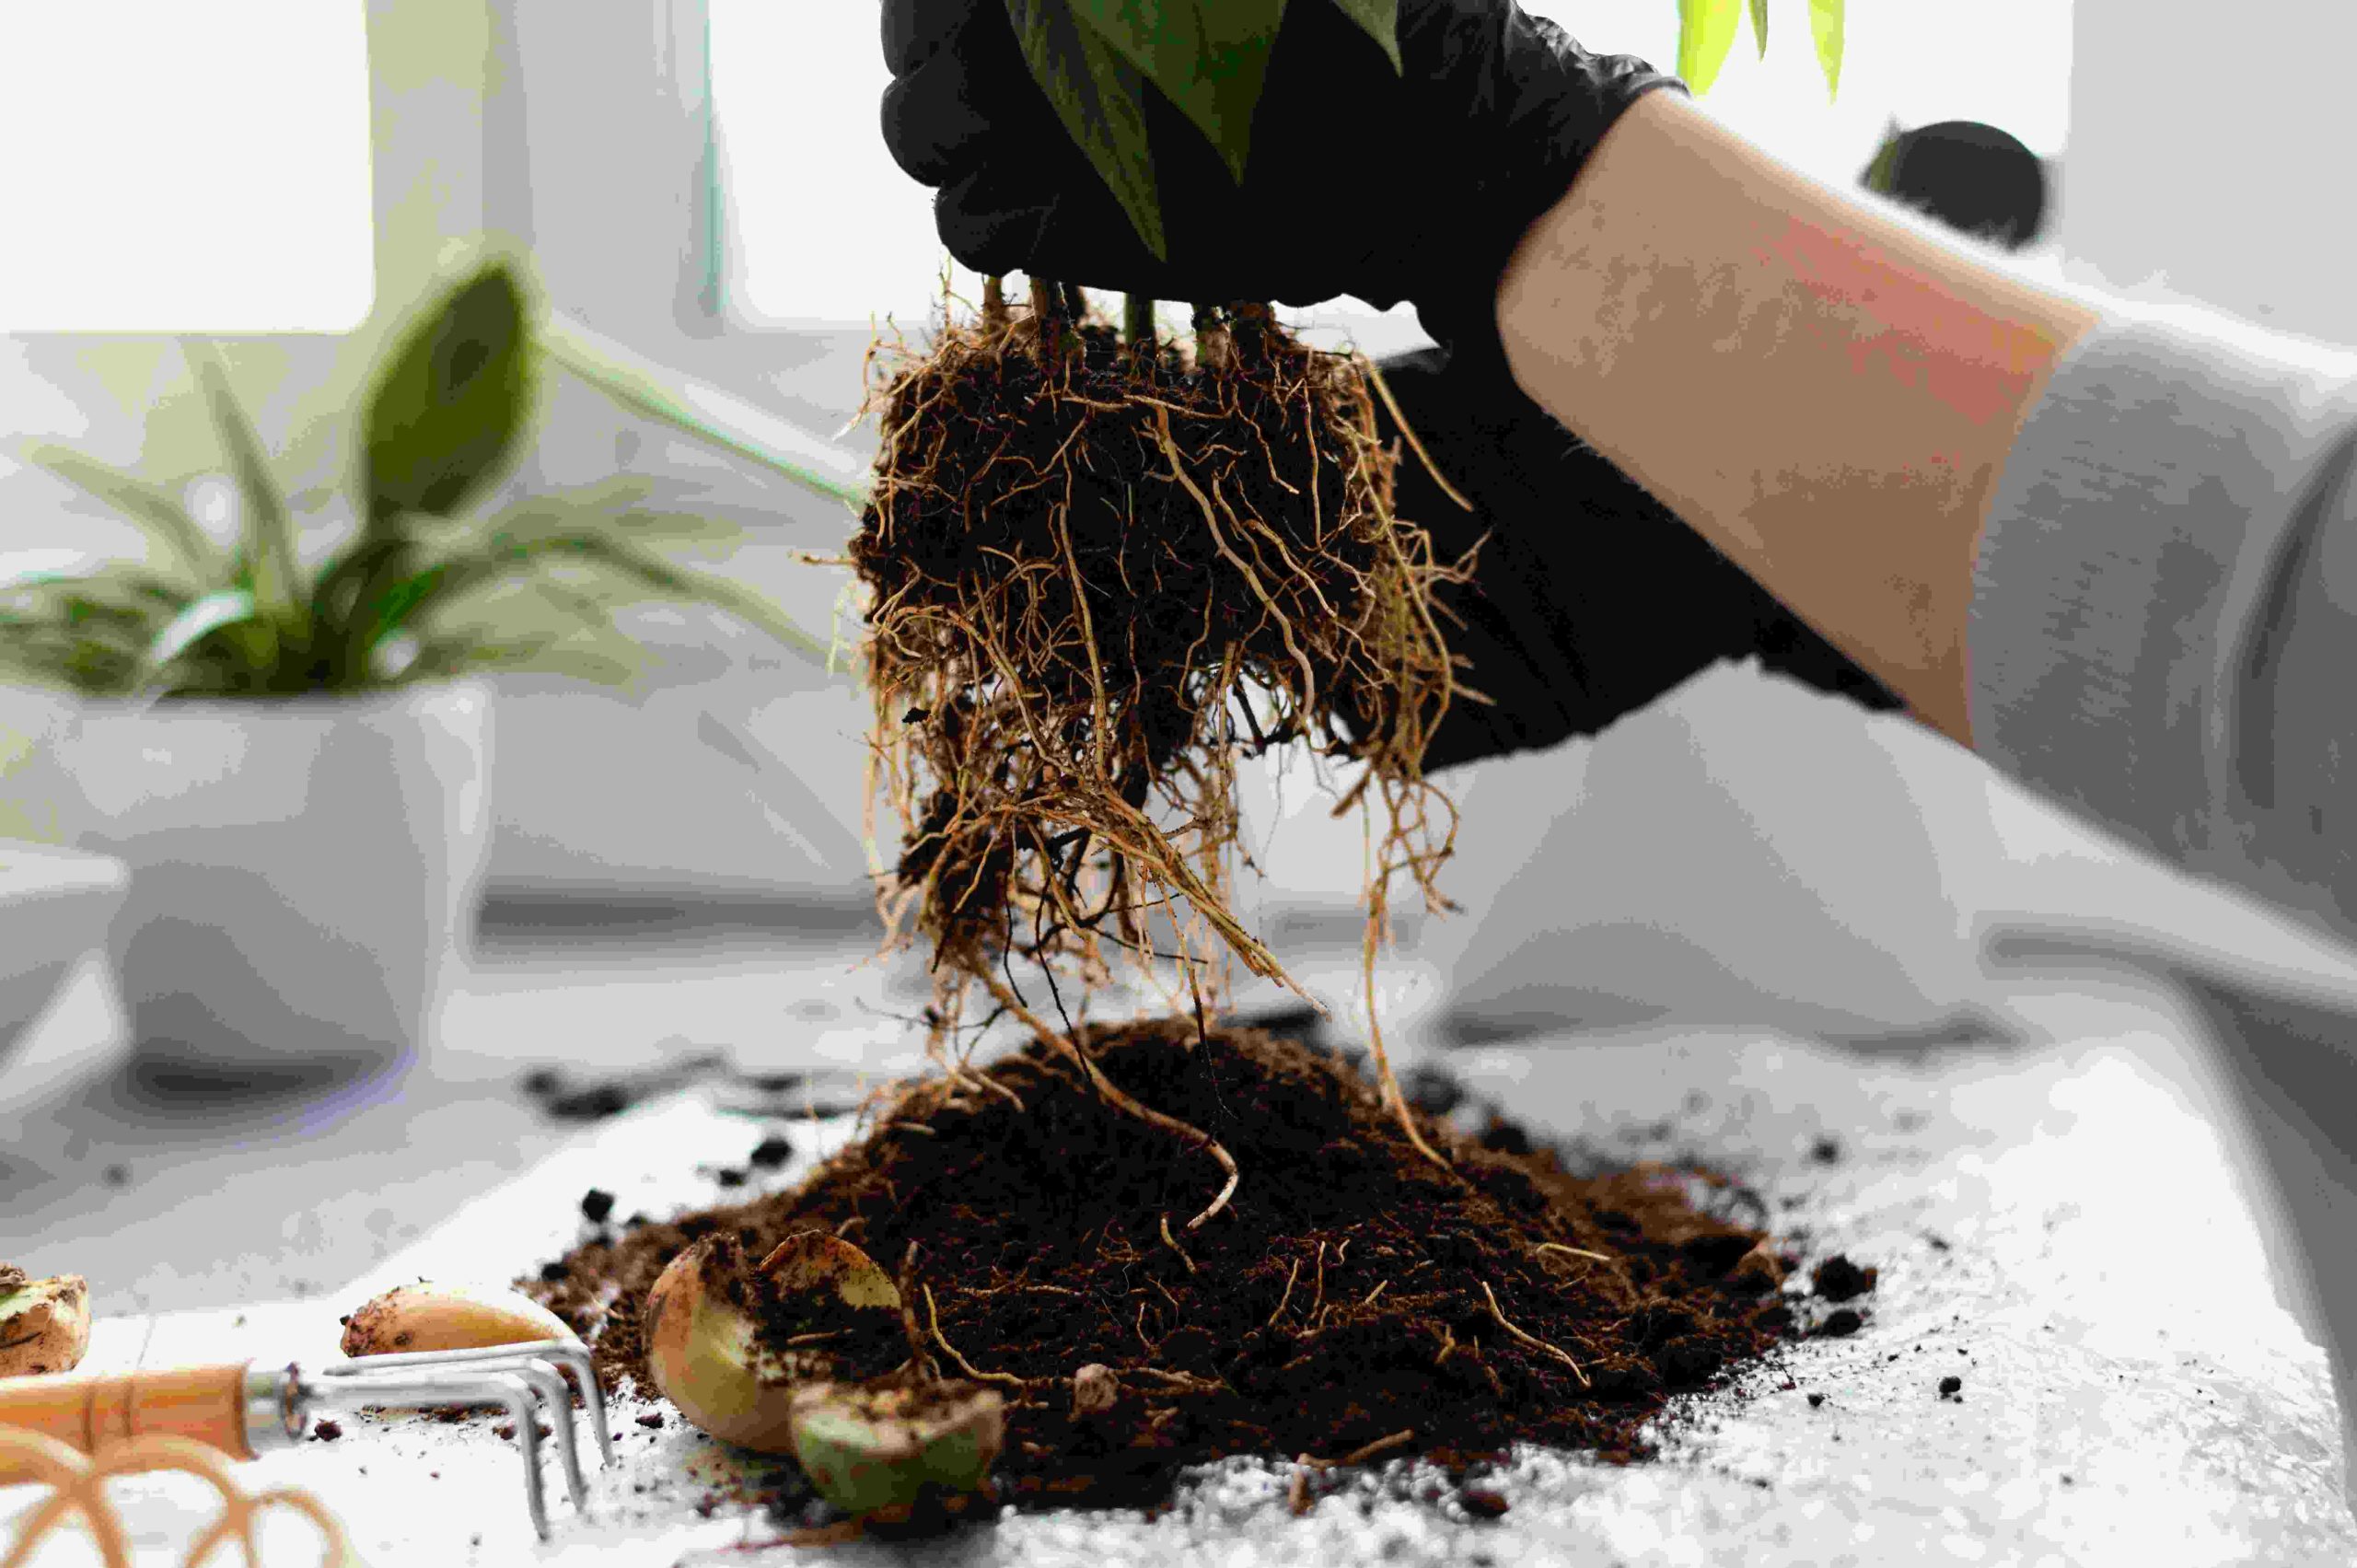
Step 4: Examine and Prune the Roots
Take a look at the roots. If you see any brown, mushy, or overly tangled roots, trim them off. Healthy roots should look white or light-colored. Gently loosen any tightly packed roots to encourage them to spread out in the new pot.
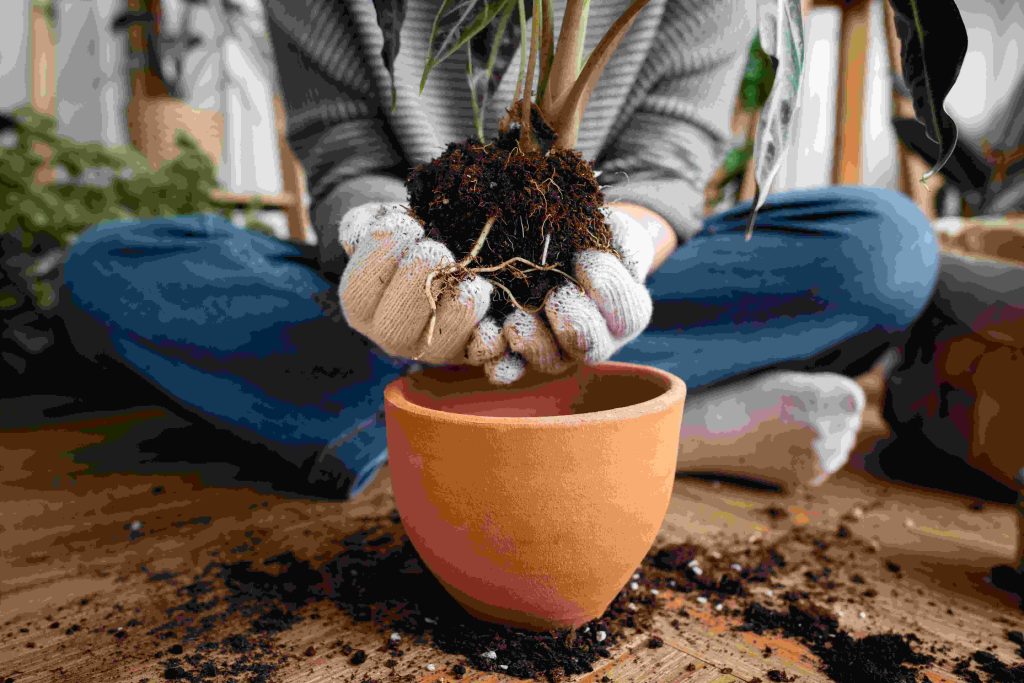
Step 5: Place the Plant in the New Pot
Position your plant in the center of the new pot. Fill in around it with fresh potting soil, gently pressing down to eliminate any air pockets. Keep the plant at the same depth as it was in its old pot—too high or too low, and it may struggle to adjust.
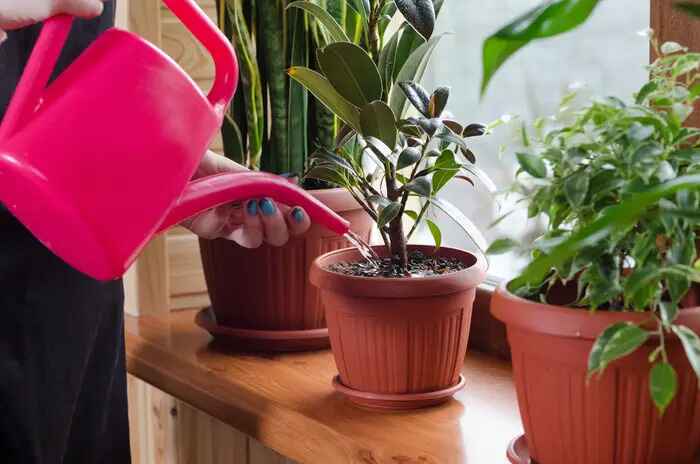
Step 6: Water the Plant Thoroughly
Give your newly potted plant a good drink to help settle the soil around the roots. Let the excess water drain out completely. This first watering is important to keep the roots hydrated and happy.
Step 7: Find the Perfect Spot for Your Plant
Once repotted, your plant may need a little time to adjust. Place it back in its ideal location, considering its light needs. Avoid placing it in direct sunlight right away, as the move might cause a bit of shock.
And that’s it! With these easy steps, your plant has a fresh start and the perfect setup to keep growing strong. Repotting may sound like a big task, but with a little care, you’ll have a happy, thriving plant in its new pot.
Post-Repotting Care
Congratulations, your plant is in its new home! Now, let’s make sure it settles in smoothly. Repotting can be a little stressful for plants, so a bit of TLC afterward will go a long way to help it adjust.
Watering Tips:
Right after repotting, you’ve already given it a good soak, so hold off on the next watering until the top layer of soil feels dry. Overwatering can be tempting, but too much moisture too soon can overwhelm the roots. Just give it time to adjust before going back to your usual watering routine.
Acclimation Time:
Your plant may show small signs of stress, like droopy leaves or slowed growth, while it adjusts. This is normal! Keep it in a stable environment with consistent light and temperature. Avoid direct sunlight right away, as your plant needs a few days to settle in.
When to Fertilize:
Since fresh potting soil is already packed with nutrients, wait at least a month before you start fertilizing. Giving your plant too many nutrients too soon can actually cause stress. Once it’s settled, you can return to your regular feeding schedule.
With a little care, your plant will be back to its happy, growing self in no time. Remember, repotting is like a reset—it can take a bit of patience, but the reward is a plant that’s ready to thrive!
Troubleshooting Common Repotting Problems
Even with the best care, sometimes plants have a rough time after repotting. No worries—here are some common issues and quick fixes to get your plant back on track.
Plant Stress (Drooping or Wilting):
It’s normal for plants to look a little tired right after repotting. If your plant seems droopy, it might just need a few days to adjust. Keep it out of direct sunlight and avoid overwatering—just give it some time, and it should perk back up soon.
Root Rot:
If you notice a foul smell or mushy, dark roots, your plant could be dealing with root rot. Carefully remove the plant from its pot, trim off any affected roots, and repot in fresh, well-draining soil. This will give your plant a healthier foundation.
Soil Drying Out Too Quickly:
If the soil is drying out faster than expected, the new pot might be a bit too large, causing the soil to drain faster. Make sure you’re using the right type of potting mix for your plant and consider adding a layer of mulch on top to help retain moisture.
Yellowing Leaves:
Leaves turning yellow after repotting is often a sign of stress or overwatering. Hold back on watering until the top inch of soil feels dry. If the problem continues, double-check the pot for drainage and make sure excess water isn’t pooling.
Remember, a few hiccups are normal! Repotting gives your plant a fresh start, and with a bit of attention, you’ll see it bounce back and thrive. Each step helps build a healthier home for your plant to grow and flourish.

Conclusion
Repotting is more than just a quick fix—it’s a game-changer for your plants! It helps give them room to grow, refreshes the soil, and ensures they stay healthy and vibrant. When done correctly, repotting boosts your plant’s chances of thriving, giving it the space and nutrients it needs to flourish.
So, keep an eye on your plants for signs they might be outgrowing their pots and ready for a little upgrade. By following the simple steps for repotting, you’ll help your indoor plants stay happy and strong for years to come. Remember, it’s all about giving your plants the best care and attention so they can grow into the beauties they were meant to be! Happy repotting!