
The Christmas cactus, scientifically known as Schlumbergera, is a beloved indoor plant cherished for its vibrant blooms that brighten homes during the holiday season. Unlike its desert cousins, this tropical cactus thrives in indirect light and humid conditions, making it a favorite for both novice and seasoned plant enthusiasts.
Propagating a Christmas cactus not only allows you to expand your indoor garden but also serves as a meaningful way to share the joy of this festive plant with friends and family. Whether you’re looking to preserve the legacy of a cherished plant or simply eager to try your hand at propagation, this guide will equip you with the knowledge and confidence to succeed.
In this article, I’ll walk you through a step-by-step process for propagating a Christmas cactus, offering insights grounded in horticultural expertise. From selecting healthy cuttings to creating the perfect environment for new growth, you’ll gain practical tips that ensure your propagation journey is both rewarding and enjoyable. Let’s get started on cultivating a new generation of these stunning plants!
What Is Propagation?
Propagation is a gardening technique used to grow new plants from an existing one, and it’s a rewarding skill for any plant enthusiast. For Christmas cacti, propagation is a simple and effective way to expand your collection or share this festive beauty with loved ones. By carefully preparing and nurturing cuttings, you can replicate the unique charm of the parent plant while ensuring its genetic traits are preserved.
When to Propagate a Christmas Cactus?
Timing is critical for successful propagation. The best time to propagate a Christmas cactus is during its active growth phase, typically in spring or early summer. During this period, the plant is naturally inclined to develop new roots and leaves, increasing your chances of success.
Avoid attempting propagation during its blooming season, as the plant’s energy is focused on flower production. Propagating during this time can stress the plant and hinder the rooting process. By choosing the right season, you give your cuttings the best environment to thrive.
Materials You’ll Need
To propagate a Christmas cactus successfully, gathering the right materials is essential. Using the correct tools and supplies ensures a smooth process and gives your cuttings the best chance to root and thrive. Here’s what you’ll need:
- A Healthy Christmas Cactus
- Choose a well-established plant with vibrant, disease-free stems. Healthy parent plants are critical to producing strong and resilient cuttings.
- Sharp, Sterilized Scissors or Pruning Shears
- Using sharp tools minimizes damage to the plant, while sterilizing them (with rubbing alcohol or boiling water) prevents the spread of bacteria or fungal infections.
- Small Pots or Containers
- Select containers with drainage holes to prevent waterlogging, which can lead to root rot.
- Well-Draining Potting Mix
- A high-quality, well-draining mix is vital. Combine equal parts of cactus soil, peat moss, and perlite or sand for a lightweight, moisture-retentive blend that supports root development.
- Rooting Hormone (Optional)
- While not mandatory, rooting hormone can speed up the rooting process and improve success rates, especially for beginners.
- Spray Bottle for Misting
- A spray bottle allows you to maintain the right level of moisture without overwatering, which is crucial for young cuttings.
By assembling these materials in advance, you’ll streamline the propagation process and set yourself up for success. The next step is preparing your cuttings with care and precision to ensure healthy growth.
Step-by-Step Guide to Propagating a Christmas Cactus
Propagating a Christmas cactus is a straightforward process when done correctly. Follow these steps to ensure your cuttings develop into healthy, thriving plants.
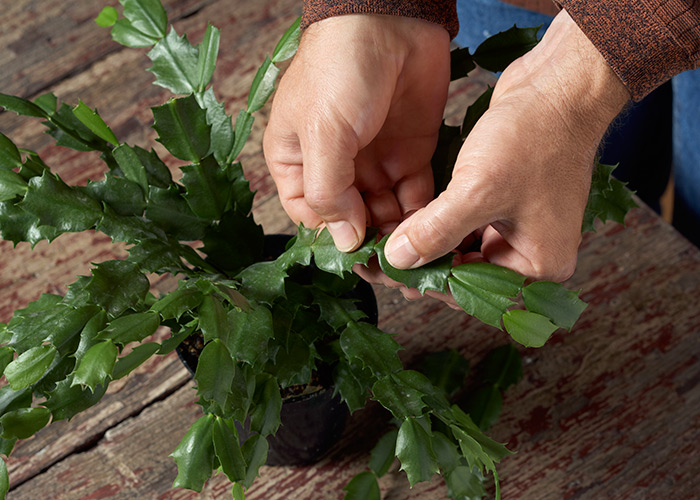
1. Choosing the Right Cuttings
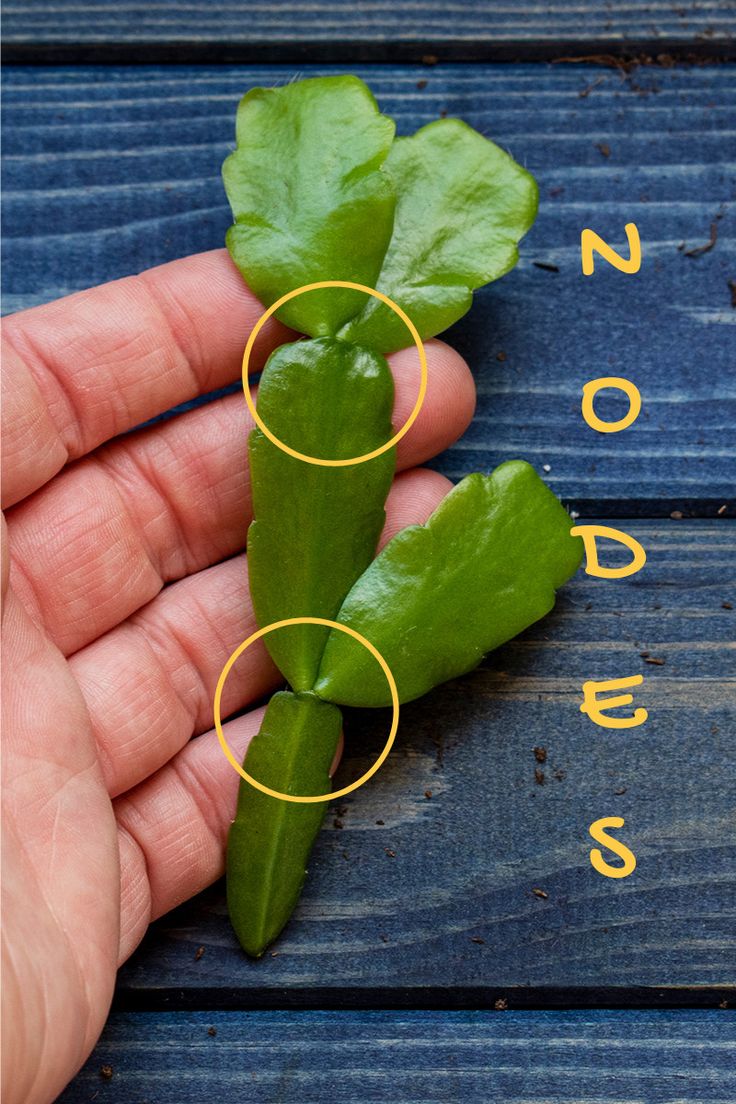
The first step in successful propagation is selecting the right cuttings. Look for healthy, mature stems with at least 3-5 segments (flattened sections of the plant). Avoid stems that appear wilted, discolored, or damaged, as these are less likely to root effectively.
Choose segments from an actively growing area of the plant. This increases the likelihood of robust root development.
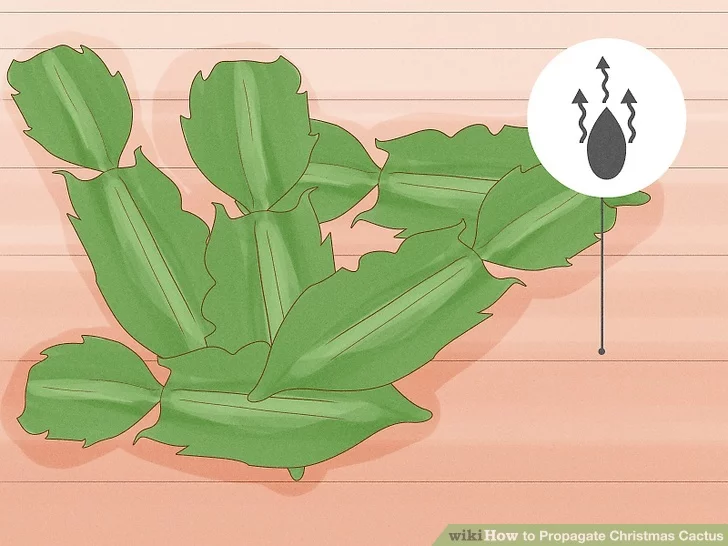
2. Preparing the Cuttings
Using sterilized scissors or pruning shears, make a clean cut just below a segment joint. Allow the cuttings to sit in a dry, shaded area for 1-2 days. This step is crucial for the cut end to form a callus, which helps prevent rot during the rooting process.
Avoid skipping the drying period—it’s a natural defense mechanism for the plant and increases your success rate significantly.
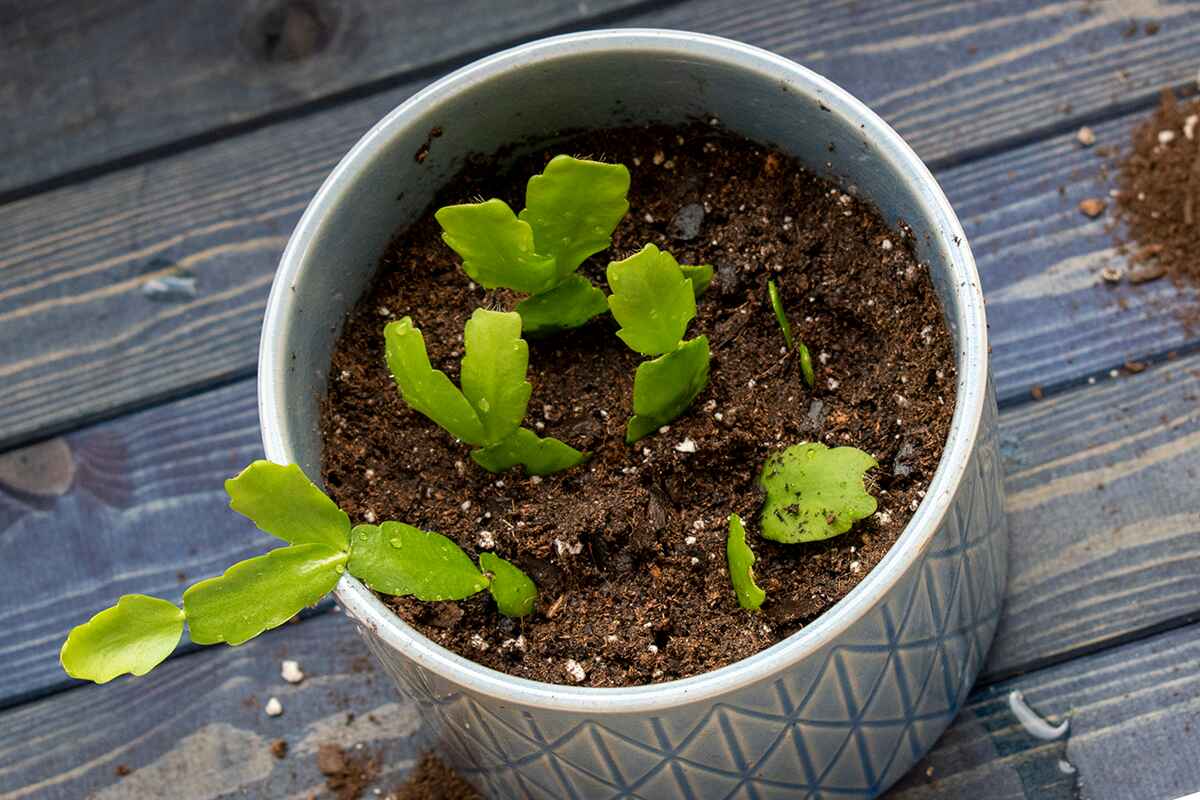
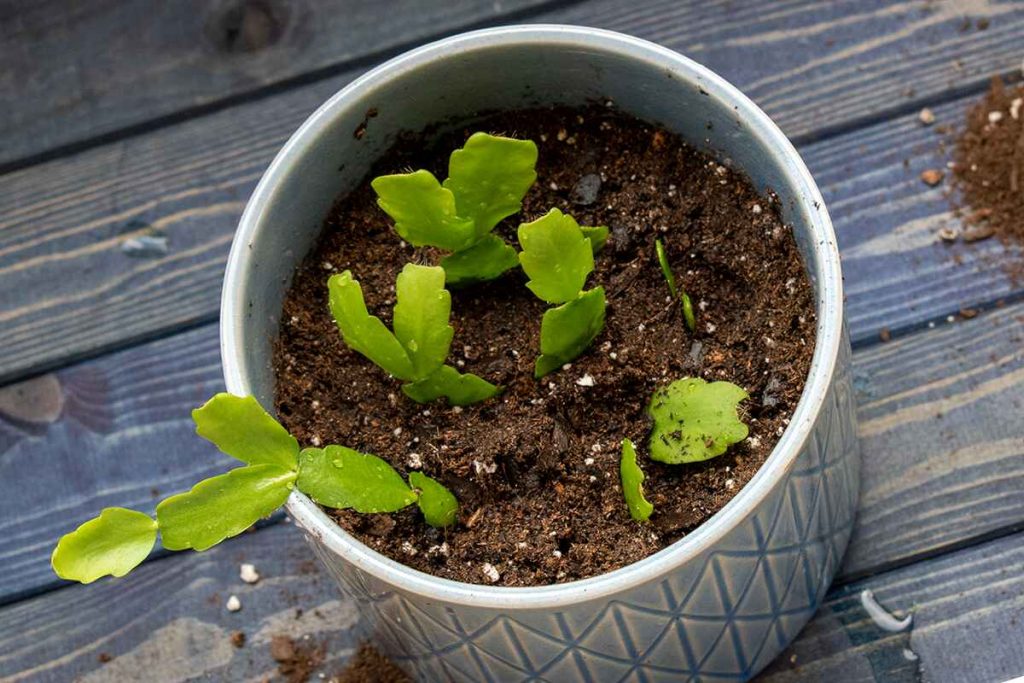
3. Planting the Cuttings
Prepare a small pot with a well-draining potting mix. Insert each cutting about 1 inch deep into the soil, ensuring the callused end is buried. Gently press the soil around the cutting to stabilize it.
If you’re using rooting hormone, dip the cut end into the powder before planting. This step isn’t mandatory but can help stimulate faster root growth. Plant multiple cuttings in one pot for better moisture retention and support during the rooting phase.
4. Providing the Right Environment
Place the potted cuttings in a warm area with indirect light. Avoid direct sunlight, as it can dry out the cuttings or stress them. Use a spray bottle to mist the soil lightly every few days, keeping it slightly moist but not soggy.
Expert Tip:
Maintain a consistent temperature of 65-75°F (18-24°C) to create optimal conditions for root development.
5. Monitoring Root Development
Roots typically begin to form within 3-6 weeks. To check for progress, gently tug on the cutting after a few weeks. Resistance indicates that roots are growing. Be patient and avoid disturbing the cuttings too often. The rooting process requires time and a stable environment.
By carefully following these steps, you can propagate your Christmas cactus with confidence and enjoy the satisfaction of nurturing new plants. Next, we’ll cover essential care tips to ensure your propagated cuttings continue to thrive.
Caring for Your Propagated Christmas Cactus
Once your cuttings have successfully rooted, the next step is to provide the right care to help them grow into healthy, mature plants. Here’s how you can ensure your propagated Christmas cactus thrives:
1. Transplanting to a Larger Pot
When the roots are well-established and the cutting starts producing new growth, it’s time to transplant it into a slightly larger pot. Choose a pot with drainage holes and fill it with a well-draining potting mix, such as a blend of cactus soil and perlite.
Expert Tip:
Avoid using an oversized pot. Christmas cacti prefer a snug pot for optimal growth. Too much soil can retain excess moisture, leading to root rot.
2. Watering Your New Plant
Proper watering is key to maintaining the health of your propagated Christmas cactus. Water the plant thoroughly when the top inch of the soil feels dry. Avoid letting the plant sit in standing water, as this can damage the roots.
Expert Tip:
Use lukewarm water to avoid shocking the plant, especially in colder months. Ensure the water drains completely from the pot.
3. Providing Optimal Light
Place your propagated Christmas cactus in a location with bright, indirect light. Too much direct sunlight can scorch the leaves, while too little light may hinder growth and flowering.Rotate the pot every few weeks to ensure even growth and prevent the plant from leaning towards one side.
4. Fertilizing for Healthy Growth
Feed your propagated plant with a diluted, balanced fertilizer (such as 10-10-10) during its active growing season, typically spring and summer. Avoid over-fertilizing, as this can cause salt buildup in the soil. Also stop fertilizing in late summer to encourage blooming during the holiday season.
5. Monitoring for Pests and Diseases
Inspect your propagated Christmas cactus regularly for signs of pests like spider mites or mealybugs. If you notice any, treat the plant promptly with insecticidal soap or neem oil. Maintain good airflow around the plant and avoid overwatering to minimize the risk of fungal infections or pest infestations.
By following these care tips, your propagated Christmas cactus will grow into a vibrant, thriving plant that adds beauty to your indoor garden. With the right attention and consistency, you’ll soon enjoy its stunning blooms, just in time for the holiday season.
Common Mistakes to Avoid When Propagating a Christmas Cactus
Even with the best intentions, certain mistakes can hinder the success of propagating a Christmas cactus. By being aware of these common pitfalls, you can ensure a smooth propagation process and healthy growth.
1. Skipping the Callusing Step
One of the most critical steps in propagation is allowing the cuttings to dry and form a callus before planting. Skipping this step increases the risk of rot, which can quickly kill the cutting.
Expert Insight:
Always give your cuttings 1-2 days to dry in a shaded area before planting. This natural healing process is essential for their survival.
2. Overwatering the Cuttings
Overwatering is one of the leading causes of failure in propagation. Cuttings are highly susceptible to rot when the soil is constantly wet. Use a spray bottle to lightly mist the soil, keeping it slightly moist but never soggy. Allow the top layer of soil to dry out between waterings.
3. Using the Wrong Soil
Planting in regular garden soil or soil that retains too much water can smother the roots and lead to poor drainage. Always use a well-draining potting mix specifically designed for cacti or succulents. You can enhance drainage by adding perlite or sand to the mix.
4. Propagating During the Wrong Season
Attempting to propagate during the blooming period or dormant phase of the plant can reduce success rates, as the cactus is not actively growing. As we have seen earlier that the ideal time for propagation is in the spring or early summer when the plant is in its growth phase and more likely to root successfully.
5. Neglecting to Monitor Light Conditions
Exposing cuttings to direct sunlight can scorch them, while insufficient light can delay root development.
Expert Insight:
Place the cuttings in a spot with bright, indirect light to provide the perfect balance for root growth.
6. Rushing the Process
Propagation requires patience. Frequently disturbing the cuttings to check for roots can disrupt their growth and cause stress to the plant.
Expert Insight:
Wait at least 3-6 weeks before checking for root development, and handle the cuttings gently to avoid damage.
By avoiding these common mistakes, you can significantly improve your chances of successfully propagating a Christmas cactus. Each step in the process contributes to the health and vitality of the new plant, setting the stage for beautiful blooms and long-lasting growth.
Propagating a Christmas cactus is a rewarding journey that combines patience, care, and attention to detail. By following the proper steps—from choosing healthy cuttings and preparing them with care to providing the ideal environment for growth—you can create new plants that will brighten your indoor spaces for years to come.
Avoiding common mistakes and staying consistent with care ensures that your propagated cactus thrives, eventually rewarding you with its iconic, festive blooms. Whether you’re propagating to expand your collection, share with loved ones, or simply embrace the joy of nurturing plants, the process is both accessible and fulfilling.
Remember, propagation is not just about creating a new plant—it’s about fostering growth and developing a deeper connection with nature. With the tips and insights shared here, you’re well-equipped to propagate your Christmas cactus successfully and enjoy the satisfaction of your gardening expertise in action.